Wednesday, May 28, 2025

From Patch to Pantry: My Peanut Growing Adventure

Ever thought you could grow peanuts in your backyard? Better yet ever thought you could grow peanuts in pots. I hadn’t either—until I tried it. Let me tell you, there’s something deeply satisfying about pulling a whole plant from the soil and finding it studded with real, honest-to-goodness peanuts. It’s like unearthing treasure with a trowel.


So, Why Peanuts?

They’re easy. Surprisingly easy because they don’t need much babysitting. If you’ve got sunshine, well-drained soil, and a touch of patience, you're halfway there.

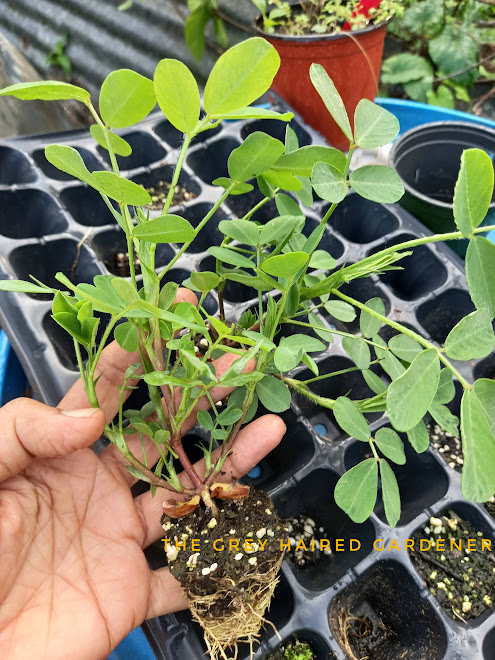
I planted mine just after the dry season started easing up last year. I tucked a few raw, unsalted shelled peanuts from the supermarket into seedling trays and waited. To my surprise, they grew!  Later, I transplanted them into garden pots.

Peanuts aren't just a crop—they're a conversation starter. Friends visiting the garden would always pause and ask, “Wait... you’re growing peanuts?!” Yes, yes I am.


Sunshine & Soil: The Peanut's Two Best Friends

Peanuts love the sun—at least 6 to 8 hours of it every day. I made sure mine got prime real estate in the garden: full exposure, front row seats to the Caribbean sun.

As for soil, they prefer it light and sandy.  That’s key because once they flower, they do something  kinda weird: they send down little pegs into the soil, and that's where the peanuts actually form. If your soil is heavy or compacted, those pegs struggle. I added compost and a bit of coarse sand to loosen things up in the pots.

                                       Compost ready to be added to soil

                                                Image Credit: Joke Vanderleij from Pixabay


Watering: Keep It Even, Not Soggy

Peanuts like consistency when it comes to water. I watered deeply once or twice a week, depending on the rain, especially once the plants started flowering. Don’t drown them, though—they hate soggy roots. Good drainage is crucial.


Fertilizer: Less Is More

Since peanuts are legumes, they make their own nitrogen (how cool is that?). I added a handful of well-rotted compost at planting, and that was it. No fancy feeding schedules, no constant fussing. They grew strong and green on their own.
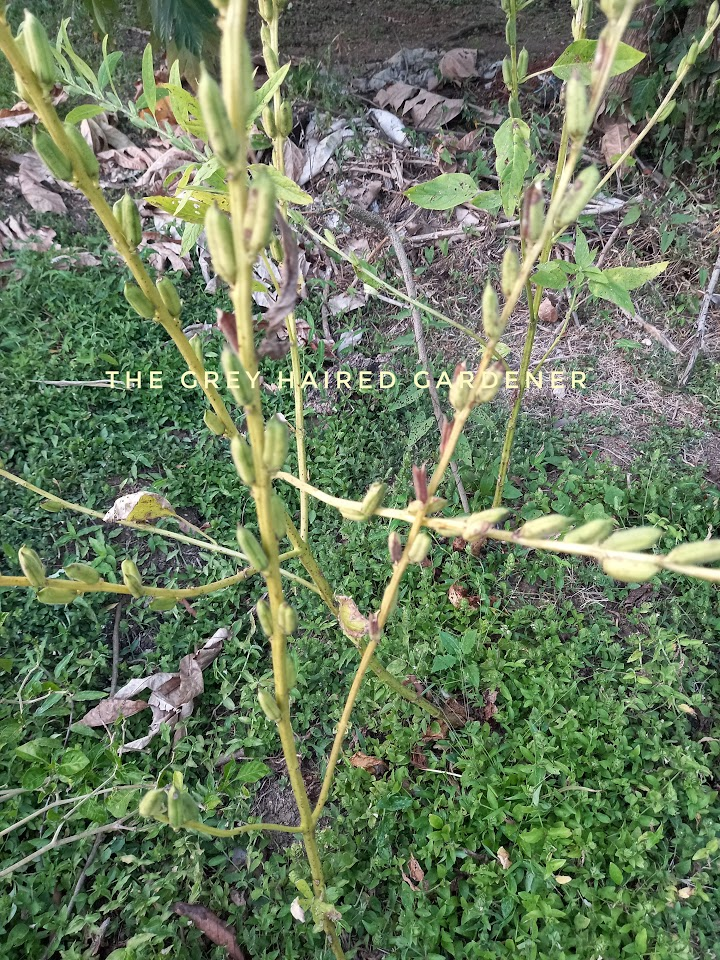

Flowering & Pegging

Around the 5-week mark, pale yellow flowers popped up. It was subtle and quick—if you blink, you’ll miss it. Soon after, I noticed the pegs poking downward into the soil. That’s when the magic starts underground. From there, it's just a waiting game.

                                                Yellow Peanut Flower: (Image Credit: Pexels.com)

                                                        Image Credit: Pixabay


Pests and Problems

To my surprise, peanuts are pretty sturdy. I had a minor aphid issue early on, but a quick blast of soapy water sorted that out. I also kept an eye out for fungal spots during the wetter spells.  Overall, they're not drama queens.

                                 Image showing aphids on a non-peanut leaf. (Image credit: Hans from Pixabay)

Harvest Time!

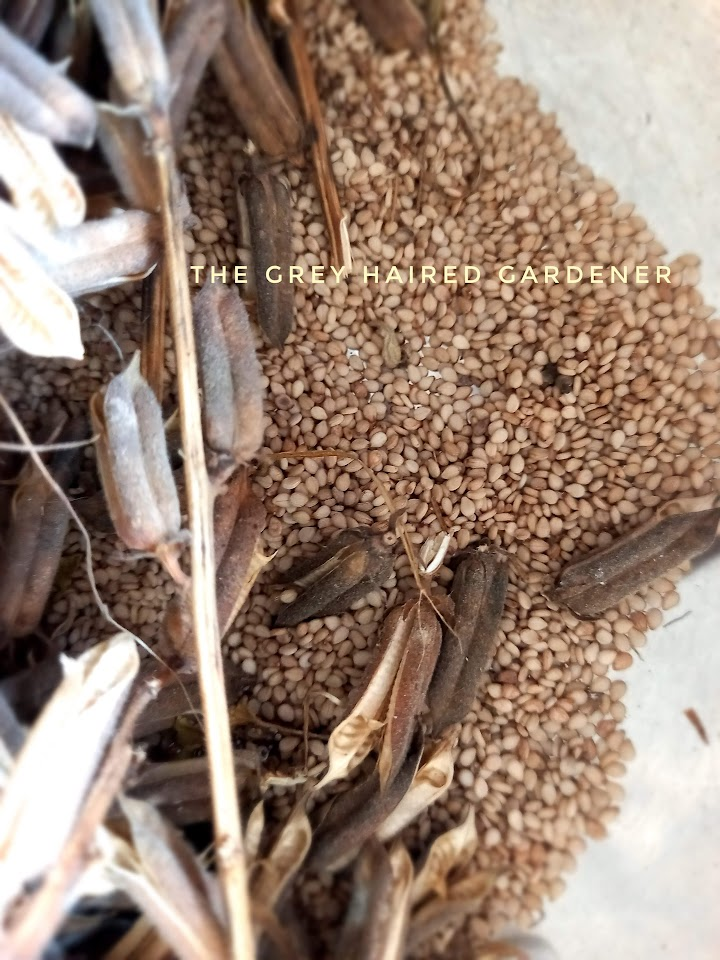
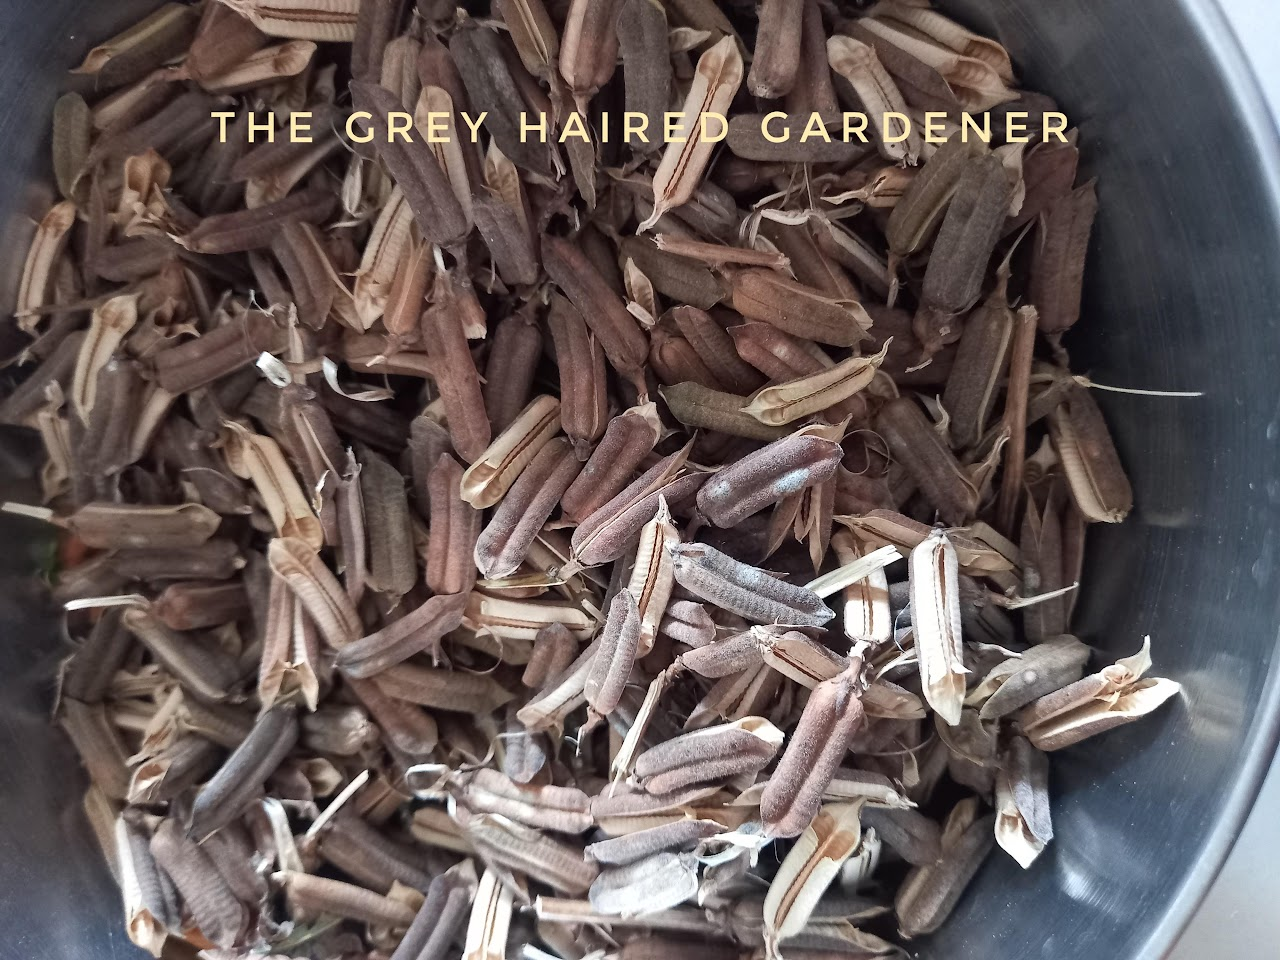
About four and a half months after planting, the leaves began to yellow—my cue to dig in. Literally. I used a hand garden fork and loosened the soil carefully to avoid damaging the pods. Lifting the plant was like pulling up a bouquet of peanuts—easily one of the most exciting harvest moments I’ve had.

I let the whole plant dry under my shed for a few days, then clipped off the pods and laid them out to cure fully. The smell? Earthy and fresh—like a farmer’s market in my own backyard.

                                                            Image Credit: Pexels.com


Kitchen Joys

Homegrown peanuts are next-level delicious. I roasted a batch with sea salt (heaven) for fresh eating and some to add to my homemade granola. I also blended some into peanut butter (a little chunky, just how I like it).  Suddenly, peanuts weren’t just snacks—they were ingredients.

Image Credit: cgdsro from  Pixabay

Image Credit: Manfred Richter from Pixabay


Final Thoughts from the Garden Bench

Growing peanuts taught me that sometimes, the most unfamiliar crops are the most rewarding. I started with curiosity and ended with a bowl of homegrown goodness and a garden story I’ll be telling for years.

So go ahead—try something new in the garden this season. You don’t need acres of land or fancy tools. Just a bit of soil, some sunshine, and the willingness to get your hands dirty.

You might just surprise yourself.

Happy digging,
The Grey-Haired Gardener๐ŸŒธ


Tuesday, May 27, 2025

Surviving the Downpours: Rainy Season Garden Tips for Caribbean Home Gardeners


                                            Image Credit: Pixabay

Hi there, my fellow garden enthusiasts!

It’s that time of year again when our Caribbean skies open up and the rain pours down. While the moisture is a blessing after the dry season, it also brings its fair share of gardening headaches! I’ve spent many a rainy season rescuing drowned seedlings and navigating muddy pathways—so here’s some hard-earned wisdom to help your garden not just survive but thrive.

Drainage is Your Best Friend

Let’s start with the big one—drainage. Without it, everything else becomes an uphill battle (or should I say a downhill flood?). Here’s what’s worked for me:

  • Raise your beds by 8–12 inches to prevent pooling around roots.

  • Add gravel or stones to the base of beds and containers for extra drainage.

  • Clear drains and ditches before the rains hit. Debris buildup can cause a swampy mess fast by blocking the flow of water.

                                        Image Credit: Rudy and Peter Skitterians - Pixabay

Choose Your Rainy Season Warriors

Some plants just handle wet weather better than others. Here are my go-to rainy season champs:

  • Dasheen – Loves water and gives you tasty leaves for callaloo

  • Amaranth (Bhaji) – Thrives through storms and gives bountiful leafy greens.

  • Pigeon Peas – Strong root systems help prevent erosion.

  • Sweet Potatoes – Their vines protect the soil and tolerate the wet.

  • Thyme, rosemary, and mint – Perfect for pots; move them under cover when rain gets heavy.

The Fungus Among Us

High humidity = fungal fiesta. Here’s how I keep it in check:

  • Space your plants to allow good air circulation.

  • Water early so leaves dry before evening.

  • Prune regularly—get rid of soggy, diseased leaves. Also helps with air flow.

  • Homemade fungicide: Mix 1 tbsp baking soda, 1 tbsp vegetable oil, and a drop of dish soap in a gallon of water. Spray weekly.


Container Gardening: Your Rainy Season Backup Plan

                                                    Image Credit: Richa Varshney at Pexels.com

  • Use pots with plenty of drainage holes.

  • Elevate containers on bricks or stones to keep them from sitting in puddles.

  • Move vulnerable plants to covered sheds or under eaves during downpours.

  • A simple cover made of clear plastic stretched over a frame can work wonders.

Soil Preservation 101

  • Mulch bare soil or plant cover crops to prevent erosion.

  • Create contours on sloped areas to slow down runoff.

  • Add organic matter to improve drainage and water-holding capacity.

Harvest Quickly, Check Often

In the rainy season, ripe fruits and veggies can rot overnight if you're not careful:

  • Pick produce as soon as it’s ready—don’t wait for the “perfect” day.

  • Check your garden daily, especially after heavy rain.

  • Preserve your harvest: freeze, pickle, or share with neighbors.

                                            Image Credit : Alexey Hulsov on Pixabay

Final Thoughts

Gardening in the Caribbean rainy season can be messy—but it’s also magical. Preparation, flexibility, and a good pair of boots go a long way. The same rain that floods your yard is what keeps our islands green and thriving.

Got your own rainy season survival tips? Share them in the comments—I’m always learning from fellow grey-haired (or any-haired!) gardeners.

Until next time, keep your boots handy and your spirits high—rain or shine!

Happy Gardening!๐ŸŒธ
The Grey-Haired Gardener

Sunday, May 25, 2025

Why are my tomatoes cracking? Here's what going on!


                                                            Photo Credit : Ivabalk - Pixabay

Ever wandered out to admire your ripening tomatoes only to find them split  down the side or across? You're not alone! Tomato fruit cracking is a common issue, especially in home gardens, but the good news is—it's preventable once you know what causes it. Let’s dig into what causes it and how to keep your tomatoes whole and happy.


1. Sudden Heavy Watering After Dry Spells

Tomatoes don’t like surprises—especially when it comes to water. If your plant's been dry for days and then gets a soaking (hello rainy season!), the fruit swells faster than the skin can stretch. The result? Cracks—usually radial ones from the top.

2. Inconsistent Watering

Skipping a few days, then overcompensating with a flood? That back-and-forth plays havoc on your plant. Uneven watering leads to pressure building inside the fruit, and eventually the skin gives way.


3. Overripe Fruit on the Vine

Leaving tomatoes on the vine too long can lead to cracking, especially during hot, humid days. As the fruit ripens, the skin softens-—combine that with moisture or heat, and splits are almost guaranteed. Harvest regularly and enjoy them fresh!


4. Excess Nitrogen 

Fertilizer is great—but too much nitrogen encourages leafy growth at the expense of fruit structure. That means bigger, juicier tomatoes with thinner skins that can’t handle internal pressure. Use a balanced fertilizer to support healthy, crack-resistant tomatoes.


5. Environmental Stress: Heat and Temperature Fluctuations

Scorching daytime heat followed by cool nights? That’s a recipe for cracked tomatoes. High temps speed up fruit growth, while cooler nights slow things down and tighten the skin—leading to splits. Shade cloth during peak heat and planting in a sheltered spot can work wonders.


6. Mineral Deficiencies, Especially Calcium

Calcium isn’t just for strong bones—it’s crucial for strong tomato skin, too. Low calcium levels weaken the fruit's cell walls, often showing up as radial cracks around the stem. A good slow-release fertilizer and regular composting can help keep your plants in balance.


8. Poor Drainage

Roots sitting in soggy soil take in more water than they need. That excess ends up in the fruit as it absorbs more water than it can handle. This puts pressure on the skin from the inside out. Raised beds, well-draining potting mix, (especially in containers) and compost-rich soil are your best friends here.


                                    Image Credit: Laurence Falcetta - Pixabay

Final Word from the Garden Path...

Don’t let a few cracks steal your tomato joy. Cracks may not look pretty, but they’re just part of the learning curve. Most split tomatoes are still delicious, so don’t toss them—turn them into salsa, sauce or your favourite tomato recipe. 

Stay consistent with watering, choose your varieties wisely, and keep learning as you grow. Every little lesson brings you one step closer to garden greatness. Stick with it, my gardening friends. Even cracked tomatoes are proof you’re growing something great. ๐ŸŒฟ๐Ÿ…


Happy Gardening!๐ŸŒธ

The Grey Haired Gardener


Friday, May 23, 2025

Mango Madness – Recipes to Savour the Season........ Because happiness really does grow on trees.


Photo Credit: m_a_essam

I absolutely love mangoes. It’s one of my all-time favourite tropical fruits. I swear I was born under a mango tree!

Growing up, we had several mango trees in the yard, and the neighbours always had plenty to share. Mangoes were never in short supply during mango season! Whether we were picking them straight from the tree, sucking on a seed, or hiding a stash in the fridge ‘just in case,’ mangoes were part of daily life.

I personally enjoy them best fresh off the tree, but mangoes are incredibly versatile — desserts, chutneys, candied or spiced preserves, curries, condiments (especially from the full green ones) ... the possibilities are endless!

                                        Photo Credit: pngkey.com

But seriously — if you’ve ever bitten into a perfectly ripe mango and felt the sweet, juicy sunshine burst across your taste buds, you’ll know exactly why mangoes are called the king of fruits. Whether you’re a die-hard mango lover searching for the best varieties, a home cook looking for creative mango recipes, or just curious about which types to try in your region — you’re in the right place.

Let’s peel back the layers of mango magic — get ready for mango season, mango recipes, and all things mango!


Mangoes We Love

The Caribbean is a mango lover’s paradise, with each island boasting its own local stars. In Trinidad and Tobago, some of the most beloved varieties include:

  • Julie – stringless, aromatic, and perfect when chilled

  • Starch – sweet, dense, and hands-down my all-time favourite

  • 10 Pound – big, bold, and great for sharing

  • Cutlass, Calabash, Rose, and Ice Cream – all delicious in their own ways

If you’re in a subtropical or temperate zone, look out for varieties like Haden, Amrapali, Carrie, and Valencia Pride — well-loved for their flavour and adaptability.

Wherever you are, mango season means one thing: happiness grows on trees.

                                         Photo Credit: Nana Abena Asiedua Akomeah(pexels,com)                            

Photo credit: Unsplash


Mango Madness: Recipes to Savour the Season

Ready to bring mangoes into your kitchen? Here are two irresistible recipes — one spicy and one sweet — perfect for the season.


๐Ÿฅญ Mango Chow (Trini Style)

This is one of Trinidad’s most iconic mango snacks. It’s salty, spicy, tangy, and totally addictive. Whether you’re liming on a hot afternoon or just raiding the fridge for something exciting, chow hits the spot every time.

Recipe source: Simply Trini Cooking (https://www.simplytrinicooking.com/mango-chow/)

You’ll need:

  • 2 green (or just turning) mangoes, peeled and sliced

  • 1–2 cloves garlic, finely chopped

  • 1 small hot pepper, chopped (scotch bonnet or bird pepper) Optional

  • Juice of 1–2 limes

  • A handful of chopped chadon beni (culantro)

  • Salt to taste

  • Optional: black pepper, shadow beni sauce

To make it:
Toss everything together in a bowl. Let it sit for 5–10 minutes for the flavours to soak in. Serve chilled — if you can wait that long!

Grey-Haired Gardener Tip:๐Ÿ’ก
This is a great way to use half ripe mangoes, and it keeps well for a day in the fridge (though good luck making it last that long).


๐Ÿฆ No-Churn Mango Ice Cream


Photo Credit: Ali Dashti (Pexels.com)

This one’s for when the afternoons are just too hot and you want something creamy, cold, and bursting with mango flavour. No fancy machines needed — just a bowl, a whisk, and some ripe mangoes.

Recipe source: Immaculate Bites(https://www.africanbites.com/mango-ice-cream/)

You’ll need:

  • 2 cups  mango puree

  • 1 can (14 oz) sweetened condensed milk

  • 2 cups cold heavy whipping cream

  • 1 tsp vanilla extract (optional)

To make it:

  1. Whip the cold heavy cream until stiff peaks form.

  2. In a separate bowl, mix the mango puree, condensed milk, and vanilla.

  3. Gently fold the whipped cream into the mango mixture until well combined.

  4. Pour into a freezer-safe container and freeze for at least 6 hours or overnight.

Grey-Haired Gardener Tip:
Use a stringless variety like Julie. Feel free to toss in chopped mango pieces, swirl in some passionfruit, or spike it with a splash of rum for grown-up flair.


Wrapping It Up: Celebrate the Season

So while the mangoes are dropping like golden gifts from the sky, take a moment to savour the season. Share them. Preserve them. Try something new in the kitchen. And maybe plant a tree — your future self will thank you.

Got your own mango recipes or memories?  Share in the comments — let’s spread the mango love.

Until next time —
Stay curious, stay joyful, and as always… happy gardening (and snacking)!
๐ŸŒฟ The Grey-Haired Gardener

Turn One Supermarket Basil Plant into an Endless Supply!


                                                Image credit: Pixabay

Ever bought a lush, leafy pot of basil from the supermarket only to have it wilt or die within a week? Don’t worry—you're not alone. What if I told you that same sad pot could become a never-ending supply of fresh, fragrant basil? Yes, really! All it takes is a little know-how and a dash of patience.

Let’s get that basil working for you—and maybe even make a few gifts or dollars on the side.


Choosing the Best Pot of Basil

Start by picking the healthiest plant you can find. Look for vibrant green leaves (no yellowing), firm stems, no flowers (that means the plants are past their vegetative stage) and a pot that looks more like a crowded jungle than a single plant—that’s a good thing! Supermarket basil is often crammed with multiple seedlings, which gives you the perfect opportunity to multiply your stock.


Separating the Plants

Gently remove the basil from the pot and tease apart the roots under running water. You’ll likely find 10–20 seedlings in there, all tangled up like spaghetti! Carefully separate them, keeping as much root attached as possible. Don’t worry if some roots break—basil is forgiving. Select the healthiest ones.


Soil Mix and Potting

Use a light, well-draining soil mix. A 50:50 blend of potting soil and compost works wonders. Plant each seedling in its own small pot (even yogurt cups with holes poked in the bottom will do for now). Press the soil gently around the base and water lightly. Place in a semi shaded area for a few days. Gradually expose these new transplants to sunlight. (a process called hardening)


Pinching the Heads (for Bushy Growth)

Once your new basil plants have 6–8 sets of leaves, it’s time to get snippy. Pinch off the top two sets of leaves above a leaf node (where two leaves meet the stem). This encourages the plant to branch out, making it bushy rather than leggy—and way more productive.

                              Image credit: https://www.thespruce.com


Watering

Water basil when the top inch of soil feels dry. It likes moist (not wet) soil. Early morning is best to avoid fungal issues. In our Caribbean heat, that might mean watering every day, especially for potted plants.


Planting Into the Garden or Larger Pots

After a couple of weeks, your basil babies will be ready to move to their permanent home. Choose a sunny garden spot or pots that are at least 8 inches deep. Basil loves the sun—give it at least 6 hours a day—and hates soggy feet, so make sure drainage is good.


Fertilizer or Compost

Basil isn’t a heavy feeder, but a little love goes a long way. Feed every 2–3 weeks with compost tea, diluted fish emulsion, or a sprinkle of well-rotted compost. If you’re using kitchen fertilizers like banana peel water or molasses (you know I love those), go easy—too much nitrogen and you’ll get lots of leaves but little flavour. Avoid chemical fertilizers as much as possible. 


Harvesting

Once your plants are bushy, you can start harvesting regularly. Never strip the plant bare—always leave a few sets of leaves so it can keep growing. Harvesting by pinching the top encourages more branching, so pick often and use in your favourite recipes!


Keep It Coming: Continuous Supply and Sharing the Green Love

Now here’s the magic part—basil roots super easily from cuttings! Snip 4–6 inch stems, strip the lower leaves, and place them in a glass of water on your kitchen windowsill. Roots will appear in about a week. Pot them up, and voilร —more basil!

You can keep a steady stream going year-round by rooting cuttings every few weeks. Use extras as gifts for friends, welcome additions to plant swaps, or even as starter stock for a little side business at the local market.


Final Thoughts

That one pot of supermarket basil is just the beginning. With a little time and care, you can grow more basil than you’ll know what to do with. Pesto, anyone?


Stay rooted,
The Grey-Haired Gardener ๐ŸŒฟ

Sunday, May 18, 2025

DIY Fertilizer from Kitchen Scraps: 5 Easy Recipes Your Plants Will Love


Before you toss those banana peels or coffee grounds, hold up—your garden might be begging for them.

Believe it or not, some of the best fertilizers aren’t in a bottle or bag from the store. They’re sitting quietly in your kitchen, waiting to be turned into plant-boosting gold. 

Turn Kitchen Scraps into Garden Gold
Here are five easy, eco-friendly DIY fertilizers you can make at home—no chemicals, no fancy equipment.

๐ŸŒ 1. Banana Peel Brew

Banana peels are rich in potassium, phosphorus, and calcium—exactly the kind of nutrients that support flowering and fruiting.

How to use it:
Chop up a banana peel or two, pop them into a mason jar or jug, and cover with water. Let it steep for 2–3 days, then use the liquid to water your plants. You’ll get a gentle nutrient boost without any chemicals.

Great for: Tomatoes, peppers, roses, and hibiscus.

                                  Photo: banana peels in a jar of water


☕ 2. Used Coffee Grounds

Don’t dump those used coffee grounds just yet! They’re loaded with nitrogen, a key nutrient for healthy leafy growth. Plus, they help improve soil structure and attract earthworms (your garden’s unpaid workforce).

How to use it:
Sprinkle cooled, used coffee grounds around your plants or mix into your compost pile. You can also brew a “coffee ground tea” by soaking them in water for a day or two and using that as liquid fertilizer.

Use in moderation—too much can make the soil acidic.

Great for: Lettuce, spinach, kale, and other leafy greens.

 Photo: Used coffee grounds in soil 


๐Ÿฅš 3. Crushed Eggshells

Eggshells are a wonderful slow-release source of calcium, which helps prevent blossom end rot in tomatoes and strengthens plant cell walls.

How to use it:
Rinse and dry your eggshells, then crush them into small pieces. Sprinkle into your planting holes or around established plants. For a finer texture, grind them into powder with a blender or mortar and pestle.

Bonus tip: The sharp edges can help deter slugs and snails.

Great for: Tomatoes, peppers, and houseplants.

                           Photo: crushed eggshells being added to soil


๐Ÿง‚ 4. Epsom Salt Mix

Epsom salt (magnesium sulfate) isn’t exactly a scrap—but you might already have some in your bathroom cupboard! It helps with chlorophyll production and can boost flower and fruit development.

How to use it:
Dissolve 1 tablespoon of Epsom salt in a gallon of water. Water your plants with this mix once a month. It’s especially helpful if you notice yellowing leaves.

Great for: Tomatoes, peppers, roses, and citrus trees.

                                  Photo: watering can and Epsom salt 


๐Ÿ”ฅ 5. Wood Ash Sprinkle

If you’ve got a fireplace or outdoor fire pit, don’t toss that wood ash—it’s full of potassium and trace minerals.

How to use it:
Let the ash cool completely. Sprinkle lightly around your plants or mix into compost. Be cautious—wood ash raises soil pH, so avoid using it near acid-loving plants.

Great for: Carrots, beets, onions, and fruit trees.

                        Photo: a small shovel of wood ash near garden soil


๐ŸŒฟ Final Thoughts

The best fertilizers might already be sitting in your kitchen. These DIY solutions are free, earth-friendly, and give your plants a gentle, natural boost—no chemicals needed.

Try one (or all!) of these easy recipes and let your garden do the talking.
Got a favourite DIY garden hack? Share it in the comments—I’d love to feature it in a future post!


Happy gardening ๐ŸŒฑ

The Grey-Haired Gardener


Wednesday, May 7, 2025

Growing Sesame: A Simple Guide to This Nutty Treasure


"Think sesame only comes from store-bought jars? Think again! This sun-loving, drought-tolerant plant is surprisingly easy to grow—and the fresh, home-harvested seeds are unbeatable in flavor!"

Sesame (Sesamum indicum) is one of the oldest oilseed crops in the world, prized for its tiny, nutrient-rich seeds. With minimal care, this sun-loving plant will reward you with a bountiful harvest of crunchy flavorful seeds that's perfect for cooking.

Sesame thrives well in warm climates with little maintenance, so its ideal for growing here in Trinidad and Tobago. It’s drought-tolerant and resilient, making it an excellent choice for home gardeners looking for a low-maintenance yet rewarding crop. I was gifted a few seeds from my neighbour, Farmer Billy and decided to try my hand at it.

Here are some tips to growing your sesame plants:


Light

Sesame loves the sun! Plant it in a full-sun location with at least 6–8 hours of direct sunlight daily for the best growth and seed production.

                                              3 of my sesame plants 

Watering

Water young plants regularly to help establish roots, but once mature, sesame thrives in dry conditions. Avoid overwatering—let the soil dry out between watering to prevent root rot. I planted my sesame plants in the dry season, so this worked fine for me.

Fertilizing

Sesame doesn’t require heavy feeding. A balanced fertilizer (20-20-20) at planting time or light compost application will support steady growth.  I fed the plants twice:  week 1 and 2 after transplanting. Too much nitrogen can lead to excessive leaves and fewer seeds.

Soil

Well-draining, loamy or sandy soil with a pH of 5.5–8.0 is ideal. Sesame hates wet feet, so avoid heavy clay or overly compacted soils.

Flowering

Sesame plants bloom about 6–8 weeks after planting, producing beautiful bell-shaped flowers that range from white to pale pink. Each flower eventually forms a seed capsule packed with tiny sesame seeds.


Pests and Diseases

Sesame is relatively pest-resistant but watch out for whiteflies, aphids, and spider mites. Proper spacing and good airflow will help prevent fungal diseases like leaf spot and root rot. I was lucky, I did not encounter any of the above.

Harvesting

Harvest sesame when the pods turn brown and begin to split—usually 90–120 days after planting

              Mature pods turning yellow upon maturity. These pods will eventually turn brown.

This is where you have to be very vigilant and look for the first signs of the pods splitting.  Although it was a bit tedious for me as I picked them one by one as the pods mature on a daily basis, it's not feasible to do so if you have a lot of plants or in a large-scale operation.

 Mature pods showing signs of splitting

 The dried pods on the plant

 The tiny seeds packed tightly into the pods


I stripped the pods off the stems and placed them in a bowl. Later, I just emptied all of it in a large brown bag and shook the life out of it!
Things have started to take shape.... starting to see some seeds! ๐Ÿ˜Š

                                         The empty pods will be thrown in the compost bin

Uses

Sesame seeds add a delicious crunch to baked goods, salads, and stir-fries. They’re also used to make tahini, sesame oil, and seasoning blends like za’atar. This tiny seed packs a punch in flavor and nutrition!

So proud of my harvest from 5 plants. May not seem like much, but to me it was a successful experiment and just shows the potential for this high protein food source that can be grown on a commercial scale for local consumption or as an export crop.

Ready to take on this challenge?  Why not try to grow a few sesame plants in your garden?  I'd love to hear all about it!


 Happy Gardening! ๐ŸŒบ๐ŸŒบ๐ŸŒบ

 The Grey-Haired Gardener

๐Ÿง… Grow Green Onions Forever (From One Bunch!)

                                                                                                  Credit: Pexels.com We call it sive here ...